mNo edit summary |
mNo edit summary |
||
| Line 1: | Line 1: | ||
| − | '''What is Jungle Trolls Reborn and what do you have to do there?'''<br />In this map it is your goal to survive as long as you can against the wilderness, weather, hostile animals and enemy trolls. You have to manage your trolls health, hunger, heat and energy with the things you can find in the jungle and the tools you are able to craft. You must overcome the wilderness or you will perish, if neccessary by force.<br />You will have to eat wild animals, insects, fish, and even Frolls. But it's not only the creatures being out for your life, you have to deal with hazardous weather, illness and the cold dark nights too, which can as easily kill you.<br />This is a survival roleplaying game, you have to constantly monitor your trolls health, state and surroundings. Improve him and his gear to help him to master the wilds.<br /><br />'''Game Start.'''<br />At gamestart the first player found in the slot 1 to 12 has to chose the game options withing 30 seconds or the game will start with default options<br />- Difficulty: Easy, Normal, Hard - This determines the severity of wilderness effects, the risk of bad weather and threat from wild animals.<br />- Mode Action: On, Off - Spawns a Great Merchant with 100 for each active tribe at their spawn location.<br />- Mode Plenty: On, Off - Doubles the amount of items spawned at intialisation and increases the general spawn of items.<br />- Mode Hardcore: On, Off - If active your troll drops ALL items on the ground he carried if he dies.<br />- Tutorial: On, Off - Shows a LONG tutorial cutscene for everyone, showing the game basics.<br />Well, we covered game modes now it's time to choose your troll.<br />Coose it wisely, you CANNOT repick.<br /> |
+ | '''What is Jungle Trolls Reborn and what do you have to do there?'''<br />In this map it is your goal to survive as long as you can against the wilderness, weather, hostile animals and enemy trolls. You have to manage your trolls health, hunger, heat and energy with the things you can find in the jungle and the tools you are able to craft. You must overcome the wilderness or you will perish, if neccessary by force.<br />You will have to eat wild animals, insects, fish, and even Frolls. But it's not only the creatures being out for your life, you have to deal with hazardous weather, illness and the cold dark nights too, which can as easily kill you.<br />This is a survival roleplaying game, you have to constantly monitor your trolls health, state and surroundings. Improve him and his gear to help him to master the wilds.<br /><br />'''Game Start.'''<br />At gamestart the first player found in the slot 1 to 12 has to chose the game options withing 30 seconds or the game will start with default options<br />- Difficulty: Easy, Normal, Hard - This determines the severity of wilderness effects, the risk of bad weather and threat from wild animals.<br />- Mode Action: On, Off - Spawns a Great Merchant with 100 for each active tribe at their spawn location.<br />- Mode Plenty: On, Off - Doubles the amount of items spawned at intialisation and increases the general spawn of items.<br />- Mode Hardcore: On, Off - If active your troll drops ALL items on the ground he carried if he dies.<br />- Tutorial: On, Off - Shows a LONG tutorial cutscene for everyone, showing the game basics.<br />Well, we covered game modes now it's time to choose your troll.<br />Coose it wisely, you CANNOT repick.<br /> |
| + | {| align="center" border="0" cellpadding="1" cellspacing="1" style="width: 500px; height: 80px;" |
||
| style="white-space: nowrap; text-align: center; width: 125px;"|[[File:BTNForestTroll.JPG|link=Warrior]] |
| style="white-space: nowrap; text-align: center; width: 125px;"|[[File:BTNForestTroll.JPG|link=Warrior]] |
||
| style="white-space: nowrap; text-align: center; width: 125px;"|[[File:BTNTroll.JPG|link=Hunter]] |
| style="white-space: nowrap; text-align: center; width: 125px;"|[[File:BTNTroll.JPG|link=Hunter]] |
||
| style="white-space: nowrap; text-align: center; width: 125px;"|[[File:BTNForestTrollShadowPriest.JPG|link=Inventor]] |
| style="white-space: nowrap; text-align: center; width: 125px;"|[[File:BTNForestTrollShadowPriest.JPG|link=Inventor]] |
||
| style="white-space: nowrap; text-align: center; width: 125px;"|[[File:BTNHeroTrollVoodooHunter.JPG|link=Shaman]] |
| style="white-space: nowrap; text-align: center; width: 125px;"|[[File:BTNHeroTrollVoodooHunter.JPG|link=Shaman]] |
||
| + | |} |
||
| − | + | <br />• The Warrior - The strongest troll in the game allowing it to wear the strongest armor and most powerfully enchanted weapons. Warriors can craft weapons right from their inventory.<br />• The Shaman - The most versatile troll, able to heal and remedy its fellow trolls. Although it can only use light armor and weapons, the spellbooks and voodoo magic make up for it. Able to play support, stealth and aussault with an army of undead minions.<br />• The Hunter - The most agile class and most likely the most difficult to master. Able to use heavy armor and weapons, proficient in meelee as in ranged combat. Hunter's traps and his taming ability make him an opponet which should not be underestimated.<br />• The Inventor - The most cunning and devastating class. He can create all sorts of contraptions to aid him and his tribe.<br /><br />Decided on the hero? Well done! So what to do next? We have the inventory item, the icon which depicts a questionmark, it's your starting item. Click on it and you are able to select a starting item for your class.<br /><br />► Shaman<br />You can choose the type of book, with which it will give us, you get one of 3 random books from this class.<br />1) Red Book - Assault Spells (Malaria, Fireball, Hold)<br />2) White book - Support Spells (Regeneration, Haste, Slow)<br />3) Blue Book - Stealth Spells (Blink, Vanish, Mirror Image)<br /><br />► Warrior<br />1) Big Bone Club - A simple club, good versus structures, can be doubled<br />2) Stone Axe - A simple axe, enables you to cut trees and bushes, can be doubled<br />3) Tortoise Shield - Blocks missiles and a percentage of the short-range attack<br /><br />► Inventor<br />1) Repair hammer - Good for repairing strucutres, virtually useless in combat<br />2) Shotgun - Shoots pellets in a cone, has to be loaded with gunpowder<br />3) Gun - Shoots a projectile at a target, has to be loaded with gunpowder<br /><br />► Hunter<br />1) Boots - Increases your movement speed and your resistance towards cold<br />2) Spear - Throwable meelee weapon, can be envonmed with poison<br />3) Bow - A simple ranged weapon comes with 15 arrows<br /><br /><br />'''Survival Stats.'''<br />Ok, this was the easy part. Now we get to the complicated part, your status indicators. You'll have to constantly check then and be aware of them in any situation or you'll most likely do the big one.<br /><br />[[File:Mana.png|left]]<br />♦ The Energy (Mana) - This scale is a measurement of you stamina. It drops constantly over time and can be restored by using ('''R''')est. You should rest before it reaches zero or you will fall into a coma, not being able to wake up before you get to 200 energy or get attacked. You regain energy very slowly during coma, so it is likely you might die to hunger or illness due to that. Resting at a tent or hut is preferable towards sleeping outside, since the amount of mana regained is higher.<br /><br />[[File:Food.png|left]]<br />♦The Food (Gold) - This shows how well fed you are, it decrases slowly over time or by using abilities like sprint or leap. If reach zero you start to starve losing health over time until you have gained some food again. You can multiple things to increase food, like berries, cooked meat, stew, raw meat, fishbones, bones and herbs. Be careful with raw meat and bones, they might make you barf or choke.<br /><br />[[File:Body_Heat.png|left]]<br />♦The Bodyheat (Wood) - This indicator shows your bodyheat, during day you regain heat quickly in the sun but during night it's advisable staying near a heatsource. If you hit zero you go into hypothermia and get cold, you movement and attackspeed is reduced. Also you have the chance of getting ill and catching a fever, which drains your health and energy. To get rid of hypothermia you have reach at least 50 points of bodyheat again.There are many ways to get your heat up again, either you try to survive somehow until the sun comes back up, you stay near a hot spring, fireplace or forge. Also fur and padded clothing provide additional protection.<br /><br /><br />'''Into the Jungle.'''<br /><br />There's another thing we havent talked about yet - it's the totem. Every active tribe gets one and so do you! The totem is your winning condition, if it gets destroyed you die instantly - no coming back from this! So better be prepared to defend this, most tribes place it within their base shielded by other structures. You have 10 minutes to place it or it will be placed automatically right at your spawn point - in case you misplaced it while trying to run from danger. The totem is not only good looking, it also has some uses:<br /><br />• Sacrifice: Increases the totems mana if you cant wait for it to raise<br /><br />• Tribalisation: You can convert a willing hostile troll to your tribe, he has to type -yes to accept<br /><br />• Miracle: Revives a troll's spirit, this is preferable to selling your soul<br /><br />There are more uses for the totem, but these are the most important. Also you might prefere the shaman healing, if you have one in team, to save mana for later.<br /><br /><br />'''What are all these things?'''<br /><br />Next thing we need is resources, you cannot build stuff without the basic materials. Some trolls prefere to split up and meet later, so they can cover more ground, this is up to you. Remember the higher the game difficulty is the stonger are the animals and the environmental effects. Try to stay clear off bushes, they might be disguised carnivous plants and ruin your first days pretty bad. And don't touch the red fishies (piranhas), they'll bit your hand right off and quickly eat the rest of you too!<br /><br />You'll have to find a suitable startegy over time between exploring the jungle, without sticking to someone and wasting everyones time by not gathering resources somewhere else, and being close enough if someone needs help getting eaten by a carnivrous plant or fending of hostile trolls. And try not to sit around in the base all the time if you don't have something to do, it's not helpful being a burden to your tribe.<br /><br />All resources can be found lying on the ground, but can be harvested otherwise too. Most people prefere to search for them during the first days since it is faster, also giving you an overlook over the nearby animals and threats.But What to do if you cant find the resource you are looking for? Well, every basic resource can be farmed somehow or bought in the merchant shop - Dont sell stuff of your teammates unasked or when you have been sitting in base all time, lazyness is no excuse.<br /><br /> |
|
| ⚫ | |||
| + | {| align="center" border="0" cellpadding="1" cellspacing="1" style="width: 500px; height: 80px;" |
||
| ⚫ | Ok, we have already learned alot about how we can survive and it was quite some important stuff.<br /><br />But there is alot more to do and to master the wilds you will have to eventually equip yor troll with the best gear suitable for the situation. As a general rule try to get the best gear for your situation, think ahead with your resources and plan what gear you will need later. There is no use to fight a bear or even alligator at early game if you simply need boots, snakeskin or simple fur boots are easier to come by at that time. Try to focus on the buildings you really need and consider your teammates needs, no one will take you serious if you sit around in base for two days and then suddenly ask for 2 stones without considering getting them yourself.<br /><br />Surely, you weren't quite clear when I was talking about forge and cauldron earlier. They are substitutes for your firekit and make it nearly obsolute, granting a permanent heatsource and cooking, since they don't have to be fueled anymore. Also they enable smelting ores, deconstructing items, cooking more stuff and brewing potions for advanced crafts. There are still some advantages to the good old firekit, it is packable, rebuildable by any troll and has a reveal invisible units in an area of 800 - sometimes it is used as a makeshift gate, although it only packs a punch or two, but that might save you from getting backstabbed by a sneaking hunter. So not every firekit goes straight in the forge, gets deconstructed and smelted into a bronze bar after all.<br /><br />To construct these buildings, you not only have to create an armory and voodoo hut first, you also need to have a rare resource - oil. And believe me it is not that easy to obtain.<br /><br />Oil geyser are located near the outer quarters of the map and they are guarded by evil alligators, giant crabs, malaria and piranhas and quicksand. You should explore if there is oil and what kind of dangers you are facing to get there.<br /><br />To harvest oil you have to hit the geyser, you can only harvest so many units as there are mana charges left in the geysir, if they are empty you'll have to wait until the next day until they are refreshed.<br /><br />1) This geyser is guarded by piranhas to the right and in most cases an alligator to the left.<br />2) This geyser is guarded in most cases by 1-2 alligators, mosquitos and crabs.<br />3) This geyser is located at the edge of a pool of quicksand and if you are unlucky in the shalloow pond next to it there's also an alligator lurking.<br />4) This geyser is located inside a pond of piranhas, also nearby animals might want to grab a bite of you to when you get close.<br /><br />There are different tricks to get to the geysers, for more a more detailed guide click here.<br /><br />► The Cauldron<br />The Cauldron Kit is created inside the Voodoo Hut and not in your inventory. It requires 1 oil, flint, wood and stone. If you aren't able to find the cauldron in your Voodoo hut switch to another page with the button second from the right on the lower line (C) until you reach the page you are looking for. The Voodoo Hut kit can be crafted in your inventory, you'll need 4 woods and 2 tinders. Open your basic crafting menu (C), use craft a rope (A) and then craft a Voodoo Hut Kit (E).<br /><br />The Cauldron expands your cooking options, unlike the fireplace it does not need to be fueled. On the other side it cannot be unpacked nor provides vision or heat. So if you have no Inventor in your team be careful about your placing. You can now cook stews out of meat, which provide also heat along with better health benefits. Additionally bones, fishbones, skulls, eggs and rotten meat can be cooked too - you should refrain from cooking troll meat, since it is more useful to be used for rotten minions or as sacrifice.<br /><br />A as in Alchemy, this new branch of crafting is now open to you! The possibility to brew potions out of the herbs you might have found throughout the jungle, giving you the upper hand in some situations. Potions are also a main ingredient when crafting new spellbooks. On a further note Hunter's can poison their arrows in the cauldron drastically increasing their lethality.<br /><br />►The Forge<br /><br />The Forge Kit is created inside the Armory and not in your inventory. It requires 1 oil and 3 flints. If you aren't able to find the cauldron in your armory switch to another page with the button second from the right on the lower line (C) until you reach the page you are looking for. The Armory Kit can be crafted in your inventory, you'll need 4 stones and 2 flints. Open your basic crafting menu (C), use craft an Armory Kit (W).<br /><br />The Forge expands your craft into the next tier, most advanced crafts require smelted ore or mana crystals. Secondary the forge give a permanent heat aura in a larger area than the fireplace, since it does not need to be fueled anymore to work. Bare in mind that the forge also cannot be unpacked, nor reveal units or cook food. One of the handy uses is the ability to disassemble crafted items and kits in the first slot, making all previously used materials available again. This cannot be done with ores and some magical equipment.<br /><br /><br />'''To the arms!'''<br /><br />Once you have built an armory (or warrior), you should immediately make yourself a weapon! You can switch through recipes in your armory with Turn Page (C), or switch to class crafting on your warrior, two times (C), the first time to open your basi crafting, the second time to open your class craftings.<br />Note that the level of an item has nothing to do with your trolls level, it is the indicator to show which classes can use them. For example hunters can use any item of level 3 and below, while shamans can only use level 1 gear.<br /><br />Level 1 < Level 2 < Level 3 < Level 4 <br /><br />Shaman < Inventor < Hunter < Warrior<br /><br />Your trolls level only gives a small bonus to attributes, it does not unlock abilities like other RPGs. Weapons do not increase your damage directly, they give you the chance to inflict more damage and grant additional effects. If you are unsure that your troll can use this item, consult the wikia page or read the tooltip/item description in game.<br /><br />Axes can be used by all classes depending on their item level : Bone Axe (shaman), Stone Axe (inventor), Bronze Axe (hunter) and Iron Axe (warrior). Axes will give you a 50% chance to deal increased damage with each hit, the factor depends on the items level. They can also be thrown at any target dealing a high amount of damage, the weapon will then drop onto the ground. Additionally axes grant the ability to manually cut trees.<br /><br />Warriors can dual wield any axes of the same level, this doubles their attack speed! This is very handy in early game, granting your warrior a nice increase in damage output and all is craftable from his inventory. Dual wield disables the ability to throw axes.<br /><br /> |
||
| + | |style="white-space: nowrap; text-align: center; width: 125px;"|[[File:Wood.jpg|left]] |
||
| + | |style="white-space: nowrap; text-align: center; width: 125px;"|[[File:Tinder.jpg|left]] |
||
| + | |} |
||
| + | <br /><br />You can cut trees and bushes for wood and tinder if you have an axe equipped. To cut them you must use (A)ttack and target the tree/bush manually - you can hold SHIFT to select multiple trees. Herb and Berry Bushes can be killed wihtout an axe for tinder too, but they wont give any fruits anymore.<br /> |
||
| + | {| align="center" border="0" cellpadding="1" cellspacing="1" style="width: 500px; height: 80px;" |
||
| + | |style="white-space: nowrap; text-align: center; width: 125px;"|[[File:Stone.JPG|left]] |
||
| + | |style="white-space: nowrap; text-align: center; width: 125px;"|[[File:Rock.png|left]] |
||
| + | |style="white-space: nowrap; text-align: center; width: 125px;"|[[File:Flint.jpg|left]] |
||
| + | |style="white-space: nowrap; text-align: center; width: 125px;"|[[File:Hard_Rock.png|left]] |
||
| + | |} |
||
| ⚫ | <br /><br />For stone and flint you can mine Rock and hard rock, you should do this with a club or pick axe equipped, they deal addidional damage and the smash speedsa up mining alot. Mining takes alot of time without the right equipment and is not recommended if you haven't cleared your part of the jungle. For every 400 damage you deal to the rock 3-5 units are dropped and if you are lucky something rare too.<br />So after some time we have gathered an amount of resources, but what to do with them now? The most important thing for the first days is a fire. You will have to craft it, you can find the basic crafting recipes in your (C)rafting Menu. open it by clicking on the button or by pressing C, you can see the requirements by hovering your mousepointer over the item you want to craft. For a firekit you need tinder, flint and stone in your inventory, craft it by clicking the button or pressing the hotkey assigned to it. To place the kit you have to select it with LMB and place the 2x2 on a free space. Note that blocked ares are colored in red and buildable in green, you might have to remove some items to place your fire kit. All buildings are built this way.<br /><br />Try to pick a spot not near any hostile animals like bears, alligators, sabretooths or mosquitos, especially the areas where bosses spawn. If you arent really confident about your abilities or have a well experienced team, this mistake wmight most likely keep you from seeing the dawn of the next day. In case you have placed your totem without exploring for potential threats first and now have to face constant attacks by an alligator, some crabs, rats and mosquitos, it's your fault, you have been warned.<br /><br />So far so good, but why isn't it lit up? Well, you have successfully build a fireplace but what do you need now? Right, flamable material! Different things burn differently well, select a piece of wood with your RMB and put it into the fireplace. Voilá, you fire is lit up at 50%, this will decrease over time as the wood is consumed. This is enough to keep you warm over a full night and to cook your raw meat. That is if it hasn't started raining or a storm has risen. Both will douse your fire, but with the storm you are in high danger causing a forst fire! For this reason you might want to place your fire a bit offside your building and/or manually douse it immediatly as soon as a storm appears. As mentioned different matrials burn differently fuelling your fire by 50% with wood, 25% with tinder and 100% with oil, which will even burn through rain and strom. As a sidenote, experienced players skip the firekit in easier gamemodes and collect the oil right aways, bulding a forge as permanent heat source.<br /><br />To cook raw meat you have to put it into the fire with RMB or pick it up with the fireplace. Oh, you dont have any raw meat yet? Ok. Time to get hunting! Be careful, you really should not fight animals unarmed, because fights will take too much from your health this way.<br /><br />Now you might want to get a weapon first, in case you haven't picked a starting weapon. You have three options, craft a dagger as basic weapon out of bone, flint or horns. Maybe you have managed to get an armory and can craft a weapon there, just make sure you can use the weapon before you craft it. Read the tooltips closely and consult the section about gear in this guide. IF you have a warrior at hand, he can craft axes and clubs from his inventory.<br /><br />Basically you can eat anything berries, honey, herbs, raw meat, raw troll meat (yuk!), bones, fishbones, hearts, eggs and all sorts of cooked stuff. Just try not to eat raw stuff like meat and bones if you dont really have to, for two reasons, a you might throw up and lose more food than you gained or you choke and lose health, which might get you killed along with starvation. Cooked food is preferable due its health benefits, if you cook food inside a cauldron it is of higher quality. We will cover forge and cauldron later.<br /><br />Also, don't fight strong animals like alligators, bears or sabretooths, they will most likely kill YOU instead. Rather hang to animals like boars, antelopes and other small animals and vermin. Luckily your food lasts until the second day, so you can concentrate on getting other resources at first. But your best bet is a wild board, just make sure that it's not short to level up (250 mana), you might want to wait to kill it until then for more resources dropped.<br /><br />Bare in mind that most animals bare offspring when they reach level 3, if you kill off too many young animals in your area you have to travel further to get rare animal resources and face potential enemies there. Or even have no more chance at all to get these resources. For example antilopes and tortoises have to become level 3 before they drop rare animal resources, if you kill them too early you might get teammates pretty angry at you. For good reason, finding a new Stag for horns can take up to two days in game if there is one. So be considerate about the stuff you kill, only kill animals if you are sure you really need the resources, dont take stuff from your teammates or base without asking for it and telling them why you want it. Nothing is as abnoxious as having everything to build an armory and forge right away, just to have your teammate make a firekit with one of your needed flints because he is cold..<br /><br />Ok, we have covered food, so what do we do next? Well, that depends, on your strategy and the game difficulty, most players prefere to focus on voodoo hut and armory to get forge and cauldron early and skip firekit. But for that you really have to know what you are doing, and this might even cost experienced players their life in hard mode. So to be save during your fist game, what you should get is a tent to sleep in, just rest near it. It is preferable to rest there than to rest outside since you are not losing heat and are sheltered from the weather a bit.<br /><br /><br />'''Speaking of the weather.'''<br /><br />There are three types of bad weather:<br />1) Rain - You get wet if you are not protected and lose gradually heat, along with the chance to slip and miss with your meelee attacks. There's a chance that lighning strikes a random object or unit, there have been quite some funny things been observed.<br />2) Snow - In rare occasions even the jungle feels the wrath of the Frozen Throne shows its wrath, you lose your heat rapidly if you are not protected or near a heatsource.<br />3) Storm - Most likely the more nasty weathers lowering your bodyheat and causing damage over time if you arent near a shelter. The worst thing that can happen during storm is that your burning fireplace sparks a forest fire.<br />The chance of these natural weathers occuring depends on three things:<br />• The chosen difficulty (frequency and strength of the effect)<br />• Totem (players can control the weather by spending mana)<br />• Idol (can be crafted and used by shamans)<br />There's a forth weather, Longest Winter, it does not occur naturally and can only summoned with the totem. If the other three types havent killed you yet a day and night cycle long combination of all 3 will most likely deliver you straight into the eternal trollgrounds.<br /><br /><br />'''Let's talk about death'''<br /><br />Death is not the end, and everybody knows it. But still best way to live is not to die.<br /><br />There are many ways to resurrect your troll. Selling your soul must be your last resort!<br /><br />Most common way is by using the totems ability Miracle. Most likely you wont have not enoguh mana, the ability is quite expensive with 500 mana. You will most likely have to sacrifice raw meat and stuff to raise it. Try to pick up your remains when you die, troll meat is 4x 40 = 160 mana if sacrificed.<br /><br />Another way is to have quested for Ring of Resurrection, but be careful, you should know how to get the mojos savely before you run into the most dangerous places of the jungle. It can be used to resurrect a spirit every 2 days.<br /><br />The last way to choose is to sell your soul if you are desperate. Do not take this easy because you can only do this once. By using the ability on your ghost you sell your soul to the devil, you will be spawned next to your totem along with a deed over a soul. If you die again, you won't spawn as ghost, you will be burned on a stake in hell!<br /><br /><br />'''Stuff, stuff and moar stuff'''.<br /><br /> |
||
| ⚫ | Ok, we have already learned alot about how we can survive and it was quite some important stuff.<br /><br />But there is alot more to do and to master the wilds you will have to eventually equip yor troll with the best gear suitable for the situation. As a general rule try to get the best gear for your situation, think ahead with your resources and plan what gear you will need later. There is no use to fight a bear or even alligator at early game if you simply need boots, snakeskin or simple fur boots are easier to come by at that time. Try to focus on the buildings you really need and consider your teammates needs, no one will take you serious if you sit around in base for two days and then suddenly ask for 2 stones without considering getting them yourself.<br /><br />Surely, you weren't quite clear when I was talking about forge and cauldron earlier. They are substitutes for your firekit and make it nearly obsolute, granting a permanent heatsource and cooking, since they don't have to be fueled anymore. Also they enable smelting ores, deconstructing items, cooking more stuff and brewing potions for advanced crafts. There are still some advantages to the good old firekit, it is packable, rebuildable by any troll and has a reveal invisible units in an area of 800 - sometimes it is used as a makeshift gate, although it only packs a punch or two, but that might save you from getting backstabbed by a sneaking hunter. So not every firekit goes straight in the forge, gets deconstructed and smelted into a bronze bar after all.<br /><br />To construct these buildings, you not only have to create an armory and voodoo hut first, you also need to have a rare resource - oil. And believe me it is not that easy to obtain.<br /><br />Oil geyser are located near the outer quarters of the map and they are guarded by evil alligators, giant crabs, malaria and piranhas and quicksand. You should explore if there is oil and what kind of dangers you are facing to get there.<br /><br />To harvest oil you have to hit the geyser, you can only harvest so many units as there are mana charges left in the geysir, if they are empty you'll have to wait until the next day until they are refreshed.<br /><br />1) This geyser is guarded by piranhas to the right and in most cases an alligator to the left.<br />2) This geyser is guarded in most cases by 1-2 alligators, mosquitos and crabs.<br />3) This geyser is located at the edge of a pool of quicksand and if you are unlucky in the shalloow pond next to it there's also an alligator lurking.<br />4) This geyser is located inside a pond of piranhas, also nearby animals might want to grab a bite of you to when you get close.<br /><br />There are different tricks to get to the geysers, for more a more detailed guide click here.<br /><br />► The Cauldron<br />The Cauldron Kit is created inside the Voodoo Hut and not in your inventory. It requires 1 oil, flint, wood and stone. If you aren't able to find the cauldron in your Voodoo hut switch to another page with the button second from the right on the lower line (C) until you reach the page you are looking for. The Voodoo Hut kit can be crafted in your inventory, you'll need 4 woods and 2 tinders. Open your basic crafting menu (C), use craft a rope (A) and then craft a Voodoo Hut Kit (E).<br /><br />The Cauldron expands your cooking options, unlike the fireplace it does not need to be fueled. On the other side it cannot be unpacked nor provides vision or heat. So if you have no Inventor in your team be careful about your placing. You can now cook stews out of meat, which provide also heat along with better health benefits. Additionally bones, fishbones, skulls, eggs and rotten meat can be cooked too - you should refrain from cooking troll meat, since it is more useful to be used for rotten minions or as sacrifice.<br /><br />A as in Alchemy, this new branch of crafting is now open to you! The possibility to brew potions out of the herbs you might have found throughout the jungle, giving you the upper hand in some situations. Potions are also a main ingredient when crafting new spellbooks. On a further note Hunter's can poison their arrows in the cauldron drastically increasing their lethality.<br /><br />►The Forge<br /><br />The Forge Kit is created inside the Armory and not in your inventory. It requires 1 oil and 3 flints. If you aren't able to find the cauldron in your armory switch to another page with the button second from the right on the lower line (C) until you reach the page you are looking for. The Armory Kit can be crafted in your inventory, you'll need 4 stones and 2 flints. Open your basic crafting menu (C), use craft an Armory Kit (W).<br /><br />The Forge expands your craft into the next tier, most advanced crafts require smelted ore or mana crystals. Secondary the forge give a permanent heat aura in a larger area than the fireplace, since it does not need to be fueled anymore to work. Bare in mind that the forge also cannot be unpacked, nor reveal units or cook food. One of the handy uses is the ability to disassemble crafted items and kits in the first slot, making all previously used materials available again. This cannot be done with ores and some magical equipment.<br /><br /><br />'''To the arms!'''<br /><br />Once you have built an armory (or warrior), you should immediately make yourself a weapon! You can switch through recipes in your armory with Turn Page (C), or switch to class crafting on your warrior, two times (C), the first time to open your basi crafting, the second time to open your class craftings.<br />Note that the level of an item has nothing to do with your trolls level, it is the indicator to show which classes can use them. For example hunters can use any item of level 3 and below, while shamans can only use level 1 gear.<br /><br />Level 1 < Level 2 < Level 3 < Level 4 <br /><br />Shaman < Inventor < Hunter < Warrior<br /><br />Your trolls level only gives a small bonus to attributes, it does not unlock abilities like other RPGs. Weapons do not increase your damage directly, they give you the chance to inflict more damage and grant additional effects. If you are unsure that your troll can use this item, consult the wikia page or read the tooltip/item description in game.<br /><br />Axes can be used by all classes depending on their item level : Bone Axe (shaman), Stone Axe (inventor), Bronze Axe (hunter) and Iron Axe (warrior). Axes will give you a 50% chance to deal increased damage with each hit, the factor depends on the items level. They can also be thrown at any target dealing a high amount of damage, the weapon will then drop onto the ground. Additionally axes grant the ability to manually cut trees.<br /><br />Warriors can dual wield any axes of the same level, this doubles their attack speed! This is very handy in early game, granting your warrior a nice increase in damage output and all is craftable from his inventory. Dual wield disables the ability to throw axes.<br /><br />+ =<br />Lumberjack Time!<br /><br />Clubs can be used by all classes depending on their item level : Bone Club (shaman), Big Bone Club (inventor), Spiked Club (hunter) and Big Spiked Club (warrior). Clubs will give you a 33% chance to deal increased damage with each hit and can stun the target for a short moment, again this depends on the items level. They can also deal a devastating smash hit on a ground target a high amount of damage and stunning the target, unlike axes the club stays in the inventory. They can deal additional damage against structures.<br /><br />Just like axes warriors can dual wield any clubs of the same level, this doublling their attack speed! Dual wield disables the ability to use smash.<br /><br />Hammer Time!<br /><br />This doesn't mean your old dagger has served its time. With a rope and a piece of wood it can be turned into an efficient poking device, namely a spear! This can be done in the warriors inventory or inside the tannery.<br /><br />Unlike daggers which are all level 1 spears have a level depending on the material: Bone Spear (shaman), Obsidian Spear (inventor), Horn Spear (hunter). Spears will give you a 20% chance to deal increased damage with each hit, again the factor depends on the items level. They can also be thrown at any target dealing a medium amount of damage, the weapon will then drop onto the ground. Spears can be coated with poison in the inventory, making them quite lethal for hit and run encounters.<br /><br />And no! Warriors cannot dual wield spears. This feature was removed in an early test versions because warriors always stumbled over the long handles and got themselves staked.<br /><br />There are types of weapons which are restricted to to certain classes:<br /><br />- Warrior: All level 4 items.<br />- Hunter: Traps and Bows.<br />- Shaman: Spellbooks, Staves, Wands and Blowpipe.<br />- Inventor: Guns, Bombs, Missiles, Grenades, Mines.<br /><br /><br />'''Full Metal Troll.'''<br /><br />So you have made some weapons to deal with those critters faster and more efficient. The next step is to make some armor and gear to shield you from the damage, environmental effects and to give you some other bonuses.<br /><br />To craft armor you will have to create a Tannery first. The Tannery Kit can be crafted in your inventory, you'll need 3 woods and 1 pig skin.<br /><br />The first thing you might want get is a pair of boots to increase your runspeed by 30 points, especially as warrior this is essential. Depending on your preferences you can decide between leather and fur boots, if you need the armor you'll most likely chose leather, which can be upgraded with a bronze bar in the armory for addiditonal protection.<br /><br />Depending on the base material leather boots can be used by different classes : Pig Skin Boots (shaman), Chitin Boots (inventor), Snake Boots (hunter) and Alligator Boots (warrior).<br /><br />If you want the runspeed to cover more ground searching for resources and animals, you will prefere fur boots since they also provide protection against cold. This is enough to travel through the jungle at night for an extended period of time on normal difficulty. Fur boots can be padded with linen cloth to improve the protection against cold.<br />All fur boots are level one and can be used by any class.<br /><br />The next you want to get is some body armor, depending on what you are facing as opponents you can chose the type of armor. Again leather is the choice if you want to go for protection against melee, it can be upgraded with 2 bronze bars and 1 iron bar to better quality.<br /><br />Depending on the base material leather armors can be used by different classes : Pig Skin Armor (shaman), Chitin Armor (inventor), Snake Armor (hunter) and Alligator Armor (warrior).<br /><br />Fur armor provide less protection against physical attacks but improve your ability to resis the cold. fur armors can be padded into gambesons providing increased protection against cold. Additionally you cannot get wet anymore and gain a 20% resistance against power attacks, like spells, arrows, gunshots etc.<br /><br />All fur armors are level one and can be used by any class, the better . They can be upgraded with a Giant Tortoise Shell into Tortoise Armor, this gives another +20% resistance against power attacks. Care the outcome of this upgrade restricts the armors by the base materials to different classes.<br /><br />Shields are a good choice for warriors who have to counter ranged attacks but also for hunters they are useful in some situations, since they cannot be used with ranged weapons equipped they prove less useful for inventors and shamans. But still in situations where you have to exspect a power attack, equipping a meele weapon with a shield might give you an edge over other ranged classes, even for shamans. Basically shields grant you a chance to negate a fixed amount of damage and giving you a spellblock every 8-16 seconds depending on their item level: Da Big Shield (shaman), Tortoise Shield and Giant Shield (inventor), Bronze Shield (hunter) and Iron Shield (warrior). Note that Da big Shield is a quest item and Giant Shield is an invention made by the inventor.<br /><br /><br />'''What, you aren't finished yet ?!'''<br /><br />Closing down further on other items would expand this already long "basic" guide into oblivion, because each class has its own characteristics and there are many ways to play a class.<br /><br />There are two NPC at the center visible to every player. To the left the Old Chief troll which grants a new quest with special items every day. To finish a quest put the items into the trolls Old Chiefs inventory and press the quest, the rewards will spawn next to the troll so be aware of reward snatching enemies. Unless a boss spawns in any of the four corners one quest is given each beginning of the day.<br /><br />To the right of the maps center is the Voodoo merchant, you can sell and buy special items from him. He can release you from your contract with the devil for 100 gold pieces. It is wise to upgrade your merchant with the trading agreement you can close with him, this enables you to trade rare resources like herbs, oil and manastone which aren't easy to come by.<br />As mentioned before, at dawn there is a chance for a boss to spawn at one of the maps corners, these bosses are mean enemies and require good gear and a good team to defeat.<br /><br />Southwest of the center is the Froll village. These are amphibious animals and will defend their village from any tresspasser. Try to stay away from them, they are armed with harpoons and are quite dangerous in numbers. As soon the village has reached a certain size they will move out and go to war, to ensure their rule over the jungle.rollo - half troll half toad. They live in areas of water and build their villages on the banks. Fish and extract energy stones, allowing them to expand their empire. Their main weapon - it harpoons. Frollo like to travel through the jungle in search of tasty fish and treasures, so they can meet almost anywhere, but if you do not touch the chances are they will not attack you, but if you manage to invade their village expect trouble.<br /><br />There are other dangerous places you should stay away from if you value your life, the Anaconda pit on the left, the spiders nest to the right, and the piranhas infested pools throughout the jungle, all capable of serving you a quick and painful death.<br /><br />If you haven't given up reading the tutorial yet, you'll have lots of fun with the map for sure. Everything you need to know is in the games tooltips and here on the wikia. If you think a information is missing feel free to add it to the wikia, or write a guide on your own.<br /><br /><br />Be good trollin 'mon! |
||
Revision as of 00:51, 7 April 2013
What is Jungle Trolls Reborn and what do you have to do there?
In this map it is your goal to survive as long as you can against the wilderness, weather, hostile animals and enemy trolls. You have to manage your trolls health, hunger, heat and energy with the things you can find in the jungle and the tools you are able to craft. You must overcome the wilderness or you will perish, if neccessary by force.
You will have to eat wild animals, insects, fish, and even Frolls. But it's not only the creatures being out for your life, you have to deal with hazardous weather, illness and the cold dark nights too, which can as easily kill you.
This is a survival roleplaying game, you have to constantly monitor your trolls health, state and surroundings. Improve him and his gear to help him to master the wilds.
Game Start.
At gamestart the first player found in the slot 1 to 12 has to chose the game options withing 30 seconds or the game will start with default options
- Difficulty: Easy, Normal, Hard - This determines the severity of wilderness effects, the risk of bad weather and threat from wild animals.
- Mode Action: On, Off - Spawns a Great Merchant with 100 for each active tribe at their spawn location.
- Mode Plenty: On, Off - Doubles the amount of items spawned at intialisation and increases the general spawn of items.
- Mode Hardcore: On, Off - If active your troll drops ALL items on the ground he carried if he dies.
- Tutorial: On, Off - Shows a LONG tutorial cutscene for everyone, showing the game basics.
Well, we covered game modes now it's time to choose your troll.
Coose it wisely, you CANNOT repick.

|

|

|

|
• The Warrior - The strongest troll in the game allowing it to wear the strongest armor and most powerfully enchanted weapons. Warriors can craft weapons right from their inventory.
• The Shaman - The most versatile troll, able to heal and remedy its fellow trolls. Although it can only use light armor and weapons, the spellbooks and voodoo magic make up for it. Able to play support, stealth and aussault with an army of undead minions.
• The Hunter - The most agile class and most likely the most difficult to master. Able to use heavy armor and weapons, proficient in meelee as in ranged combat. Hunter's traps and his taming ability make him an opponet which should not be underestimated.
• The Inventor - The most cunning and devastating class. He can create all sorts of contraptions to aid him and his tribe.
Decided on the hero? Well done! So what to do next? We have the inventory item, the icon which depicts a questionmark, it's your starting item. Click on it and you are able to select a starting item for your class.
► Shaman
You can choose the type of book, with which it will give us, you get one of 3 random books from this class.
1) Red Book - Assault Spells (Malaria, Fireball, Hold)
2) White book - Support Spells (Regeneration, Haste, Slow)
3) Blue Book - Stealth Spells (Blink, Vanish, Mirror Image)
► Warrior
1) Big Bone Club - A simple club, good versus structures, can be doubled
2) Stone Axe - A simple axe, enables you to cut trees and bushes, can be doubled
3) Tortoise Shield - Blocks missiles and a percentage of the short-range attack
► Inventor
1) Repair hammer - Good for repairing strucutres, virtually useless in combat
2) Shotgun - Shoots pellets in a cone, has to be loaded with gunpowder
3) Gun - Shoots a projectile at a target, has to be loaded with gunpowder
► Hunter
1) Boots - Increases your movement speed and your resistance towards cold
2) Spear - Throwable meelee weapon, can be envonmed with poison
3) Bow - A simple ranged weapon comes with 15 arrows
Survival Stats.
Ok, this was the easy part. Now we get to the complicated part, your status indicators. You'll have to constantly check then and be aware of them in any situation or you'll most likely do the big one.
♦ The Energy (Mana) - This scale is a measurement of you stamina. It drops constantly over time and can be restored by using (R)est. You should rest before it reaches zero or you will fall into a coma, not being able to wake up before you get to 200 energy or get attacked. You regain energy very slowly during coma, so it is likely you might die to hunger or illness due to that. Resting at a tent or hut is preferable towards sleeping outside, since the amount of mana regained is higher.
♦The Food (Gold) - This shows how well fed you are, it decrases slowly over time or by using abilities like sprint or leap. If reach zero you start to starve losing health over time until you have gained some food again. You can multiple things to increase food, like berries, cooked meat, stew, raw meat, fishbones, bones and herbs. Be careful with raw meat and bones, they might make you barf or choke.
♦The Bodyheat (Wood) - This indicator shows your bodyheat, during day you regain heat quickly in the sun but during night it's advisable staying near a heatsource. If you hit zero you go into hypothermia and get cold, you movement and attackspeed is reduced. Also you have the chance of getting ill and catching a fever, which drains your health and energy. To get rid of hypothermia you have reach at least 50 points of bodyheat again.There are many ways to get your heat up again, either you try to survive somehow until the sun comes back up, you stay near a hot spring, fireplace or forge. Also fur and padded clothing provide additional protection.
Into the Jungle.
There's another thing we havent talked about yet - it's the totem. Every active tribe gets one and so do you! The totem is your winning condition, if it gets destroyed you die instantly - no coming back from this! So better be prepared to defend this, most tribes place it within their base shielded by other structures. You have 10 minutes to place it or it will be placed automatically right at your spawn point - in case you misplaced it while trying to run from danger. The totem is not only good looking, it also has some uses:
• Sacrifice: Increases the totems mana if you cant wait for it to raise
• Tribalisation: You can convert a willing hostile troll to your tribe, he has to type -yes to accept
• Miracle: Revives a troll's spirit, this is preferable to selling your soul
There are more uses for the totem, but these are the most important. Also you might prefere the shaman healing, if you have one in team, to save mana for later.
What are all these things?
Next thing we need is resources, you cannot build stuff without the basic materials. Some trolls prefere to split up and meet later, so they can cover more ground, this is up to you. Remember the higher the game difficulty is the stonger are the animals and the environmental effects. Try to stay clear off bushes, they might be disguised carnivous plants and ruin your first days pretty bad. And don't touch the red fishies (piranhas), they'll bit your hand right off and quickly eat the rest of you too!
You'll have to find a suitable startegy over time between exploring the jungle, without sticking to someone and wasting everyones time by not gathering resources somewhere else, and being close enough if someone needs help getting eaten by a carnivrous plant or fending of hostile trolls. And try not to sit around in the base all the time if you don't have something to do, it's not helpful being a burden to your tribe.
All resources can be found lying on the ground, but can be harvested otherwise too. Most people prefere to search for them during the first days since it is faster, also giving you an overlook over the nearby animals and threats.But What to do if you cant find the resource you are looking for? Well, every basic resource can be farmed somehow or bought in the merchant shop - Dont sell stuff of your teammates unasked or when you have been sitting in base all time, lazyness is no excuse.
 |
 |
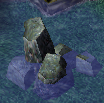
You can cut trees and bushes for wood and tinder if you have an axe equipped. To cut them you must use (A)ttack and target the tree/bush manually - you can hold SHIFT to select multiple trees. Herb and Berry Bushes can be killed wihtout an axe for tinder too, but they wont give any fruits anymore.
 |
 |
 |
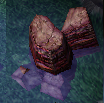 |
For stone and flint you can mine Rock and hard rock, you should do this with a club or pick axe equipped, they deal addidional damage and the smash speedsa up mining alot. Mining takes alot of time without the right equipment and is not recommended if you haven't cleared your part of the jungle. For every 400 damage you deal to the rock 3-5 units are dropped and if you are lucky something rare too.
So after some time we have gathered an amount of resources, but what to do with them now? The most important thing for the first days is a fire. You will have to craft it, you can find the basic crafting recipes in your (C)rafting Menu. open it by clicking on the button or by pressing C, you can see the requirements by hovering your mousepointer over the item you want to craft. For a firekit you need tinder, flint and stone in your inventory, craft it by clicking the button or pressing the hotkey assigned to it. To place the kit you have to select it with LMB and place the 2x2 on a free space. Note that blocked ares are colored in red and buildable in green, you might have to remove some items to place your fire kit. All buildings are built this way.
Try to pick a spot not near any hostile animals like bears, alligators, sabretooths or mosquitos, especially the areas where bosses spawn. If you arent really confident about your abilities or have a well experienced team, this mistake wmight most likely keep you from seeing the dawn of the next day. In case you have placed your totem without exploring for potential threats first and now have to face constant attacks by an alligator, some crabs, rats and mosquitos, it's your fault, you have been warned.
So far so good, but why isn't it lit up? Well, you have successfully build a fireplace but what do you need now? Right, flamable material! Different things burn differently well, select a piece of wood with your RMB and put it into the fireplace. Voilá, you fire is lit up at 50%, this will decrease over time as the wood is consumed. This is enough to keep you warm over a full night and to cook your raw meat. That is if it hasn't started raining or a storm has risen. Both will douse your fire, but with the storm you are in high danger causing a forst fire! For this reason you might want to place your fire a bit offside your building and/or manually douse it immediatly as soon as a storm appears. As mentioned different matrials burn differently fuelling your fire by 50% with wood, 25% with tinder and 100% with oil, which will even burn through rain and strom. As a sidenote, experienced players skip the firekit in easier gamemodes and collect the oil right aways, bulding a forge as permanent heat source.
To cook raw meat you have to put it into the fire with RMB or pick it up with the fireplace. Oh, you dont have any raw meat yet? Ok. Time to get hunting! Be careful, you really should not fight animals unarmed, because fights will take too much from your health this way.
Now you might want to get a weapon first, in case you haven't picked a starting weapon. You have three options, craft a dagger as basic weapon out of bone, flint or horns. Maybe you have managed to get an armory and can craft a weapon there, just make sure you can use the weapon before you craft it. Read the tooltips closely and consult the section about gear in this guide. IF you have a warrior at hand, he can craft axes and clubs from his inventory.
Basically you can eat anything berries, honey, herbs, raw meat, raw troll meat (yuk!), bones, fishbones, hearts, eggs and all sorts of cooked stuff. Just try not to eat raw stuff like meat and bones if you dont really have to, for two reasons, a you might throw up and lose more food than you gained or you choke and lose health, which might get you killed along with starvation. Cooked food is preferable due its health benefits, if you cook food inside a cauldron it is of higher quality. We will cover forge and cauldron later.
Also, don't fight strong animals like alligators, bears or sabretooths, they will most likely kill YOU instead. Rather hang to animals like boars, antelopes and other small animals and vermin. Luckily your food lasts until the second day, so you can concentrate on getting other resources at first. But your best bet is a wild board, just make sure that it's not short to level up (250 mana), you might want to wait to kill it until then for more resources dropped.
Bare in mind that most animals bare offspring when they reach level 3, if you kill off too many young animals in your area you have to travel further to get rare animal resources and face potential enemies there. Or even have no more chance at all to get these resources. For example antilopes and tortoises have to become level 3 before they drop rare animal resources, if you kill them too early you might get teammates pretty angry at you. For good reason, finding a new Stag for horns can take up to two days in game if there is one. So be considerate about the stuff you kill, only kill animals if you are sure you really need the resources, dont take stuff from your teammates or base without asking for it and telling them why you want it. Nothing is as abnoxious as having everything to build an armory and forge right away, just to have your teammate make a firekit with one of your needed flints because he is cold..
Ok, we have covered food, so what do we do next? Well, that depends, on your strategy and the game difficulty, most players prefere to focus on voodoo hut and armory to get forge and cauldron early and skip firekit. But for that you really have to know what you are doing, and this might even cost experienced players their life in hard mode. So to be save during your fist game, what you should get is a tent to sleep in, just rest near it. It is preferable to rest there than to rest outside since you are not losing heat and are sheltered from the weather a bit.
Speaking of the weather.
There are three types of bad weather:
1) Rain - You get wet if you are not protected and lose gradually heat, along with the chance to slip and miss with your meelee attacks. There's a chance that lighning strikes a random object or unit, there have been quite some funny things been observed.
2) Snow - In rare occasions even the jungle feels the wrath of the Frozen Throne shows its wrath, you lose your heat rapidly if you are not protected or near a heatsource.
3) Storm - Most likely the more nasty weathers lowering your bodyheat and causing damage over time if you arent near a shelter. The worst thing that can happen during storm is that your burning fireplace sparks a forest fire.
The chance of these natural weathers occuring depends on three things:
• The chosen difficulty (frequency and strength of the effect)
• Totem (players can control the weather by spending mana)
• Idol (can be crafted and used by shamans)
There's a forth weather, Longest Winter, it does not occur naturally and can only summoned with the totem. If the other three types havent killed you yet a day and night cycle long combination of all 3 will most likely deliver you straight into the eternal trollgrounds.
Let's talk about death
Death is not the end, and everybody knows it. But still best way to live is not to die.
There are many ways to resurrect your troll. Selling your soul must be your last resort!
Most common way is by using the totems ability Miracle. Most likely you wont have not enoguh mana, the ability is quite expensive with 500 mana. You will most likely have to sacrifice raw meat and stuff to raise it. Try to pick up your remains when you die, troll meat is 4x 40 = 160 mana if sacrificed.
Another way is to have quested for Ring of Resurrection, but be careful, you should know how to get the mojos savely before you run into the most dangerous places of the jungle. It can be used to resurrect a spirit every 2 days.
The last way to choose is to sell your soul if you are desperate. Do not take this easy because you can only do this once. By using the ability on your ghost you sell your soul to the devil, you will be spawned next to your totem along with a deed over a soul. If you die again, you won't spawn as ghost, you will be burned on a stake in hell!
Stuff, stuff and moar stuff.
Ok, we have already learned alot about how we can survive and it was quite some important stuff.
But there is alot more to do and to master the wilds you will have to eventually equip yor troll with the best gear suitable for the situation. As a general rule try to get the best gear for your situation, think ahead with your resources and plan what gear you will need later. There is no use to fight a bear or even alligator at early game if you simply need boots, snakeskin or simple fur boots are easier to come by at that time. Try to focus on the buildings you really need and consider your teammates needs, no one will take you serious if you sit around in base for two days and then suddenly ask for 2 stones without considering getting them yourself.
Surely, you weren't quite clear when I was talking about forge and cauldron earlier. They are substitutes for your firekit and make it nearly obsolute, granting a permanent heatsource and cooking, since they don't have to be fueled anymore. Also they enable smelting ores, deconstructing items, cooking more stuff and brewing potions for advanced crafts. There are still some advantages to the good old firekit, it is packable, rebuildable by any troll and has a reveal invisible units in an area of 800 - sometimes it is used as a makeshift gate, although it only packs a punch or two, but that might save you from getting backstabbed by a sneaking hunter. So not every firekit goes straight in the forge, gets deconstructed and smelted into a bronze bar after all.
To construct these buildings, you not only have to create an armory and voodoo hut first, you also need to have a rare resource - oil. And believe me it is not that easy to obtain.
Oil geyser are located near the outer quarters of the map and they are guarded by evil alligators, giant crabs, malaria and piranhas and quicksand. You should explore if there is oil and what kind of dangers you are facing to get there.
To harvest oil you have to hit the geyser, you can only harvest so many units as there are mana charges left in the geysir, if they are empty you'll have to wait until the next day until they are refreshed.
1) This geyser is guarded by piranhas to the right and in most cases an alligator to the left.
2) This geyser is guarded in most cases by 1-2 alligators, mosquitos and crabs.
3) This geyser is located at the edge of a pool of quicksand and if you are unlucky in the shalloow pond next to it there's also an alligator lurking.
4) This geyser is located inside a pond of piranhas, also nearby animals might want to grab a bite of you to when you get close.
There are different tricks to get to the geysers, for more a more detailed guide click here.
► The Cauldron
The Cauldron Kit is created inside the Voodoo Hut and not in your inventory. It requires 1 oil, flint, wood and stone. If you aren't able to find the cauldron in your Voodoo hut switch to another page with the button second from the right on the lower line (C) until you reach the page you are looking for. The Voodoo Hut kit can be crafted in your inventory, you'll need 4 woods and 2 tinders. Open your basic crafting menu (C), use craft a rope (A) and then craft a Voodoo Hut Kit (E).
The Cauldron expands your cooking options, unlike the fireplace it does not need to be fueled. On the other side it cannot be unpacked nor provides vision or heat. So if you have no Inventor in your team be careful about your placing. You can now cook stews out of meat, which provide also heat along with better health benefits. Additionally bones, fishbones, skulls, eggs and rotten meat can be cooked too - you should refrain from cooking troll meat, since it is more useful to be used for rotten minions or as sacrifice.
A as in Alchemy, this new branch of crafting is now open to you! The possibility to brew potions out of the herbs you might have found throughout the jungle, giving you the upper hand in some situations. Potions are also a main ingredient when crafting new spellbooks. On a further note Hunter's can poison their arrows in the cauldron drastically increasing their lethality.
►The Forge
The Forge Kit is created inside the Armory and not in your inventory. It requires 1 oil and 3 flints. If you aren't able to find the cauldron in your armory switch to another page with the button second from the right on the lower line (C) until you reach the page you are looking for. The Armory Kit can be crafted in your inventory, you'll need 4 stones and 2 flints. Open your basic crafting menu (C), use craft an Armory Kit (W).
The Forge expands your craft into the next tier, most advanced crafts require smelted ore or mana crystals. Secondary the forge give a permanent heat aura in a larger area than the fireplace, since it does not need to be fueled anymore to work. Bare in mind that the forge also cannot be unpacked, nor reveal units or cook food. One of the handy uses is the ability to disassemble crafted items and kits in the first slot, making all previously used materials available again. This cannot be done with ores and some magical equipment.
To the arms!
Once you have built an armory (or warrior), you should immediately make yourself a weapon! You can switch through recipes in your armory with Turn Page (C), or switch to class crafting on your warrior, two times (C), the first time to open your basi crafting, the second time to open your class craftings.
Note that the level of an item has nothing to do with your trolls level, it is the indicator to show which classes can use them. For example hunters can use any item of level 3 and below, while shamans can only use level 1 gear.
Level 1 < Level 2 < Level 3 < Level 4
Shaman < Inventor < Hunter < Warrior
Your trolls level only gives a small bonus to attributes, it does not unlock abilities like other RPGs. Weapons do not increase your damage directly, they give you the chance to inflict more damage and grant additional effects. If you are unsure that your troll can use this item, consult the wikia page or read the tooltip/item description in game.
Axes can be used by all classes depending on their item level : Bone Axe (shaman), Stone Axe (inventor), Bronze Axe (hunter) and Iron Axe (warrior). Axes will give you a 50% chance to deal increased damage with each hit, the factor depends on the items level. They can also be thrown at any target dealing a high amount of damage, the weapon will then drop onto the ground. Additionally axes grant the ability to manually cut trees.
Warriors can dual wield any axes of the same level, this doubles their attack speed! This is very handy in early game, granting your warrior a nice increase in damage output and all is craftable from his inventory. Dual wield disables the ability to throw axes.
+ =
Lumberjack Time!
Clubs can be used by all classes depending on their item level : Bone Club (shaman), Big Bone Club (inventor), Spiked Club (hunter) and Big Spiked Club (warrior). Clubs will give you a 33% chance to deal increased damage with each hit and can stun the target for a short moment, again this depends on the items level. They can also deal a devastating smash hit on a ground target a high amount of damage and stunning the target, unlike axes the club stays in the inventory. They can deal additional damage against structures.
Just like axes warriors can dual wield any clubs of the same level, this doublling their attack speed! Dual wield disables the ability to use smash.
Hammer Time!
This doesn't mean your old dagger has served its time. With a rope and a piece of wood it can be turned into an efficient poking device, namely a spear! This can be done in the warriors inventory or inside the tannery.
Unlike daggers which are all level 1 spears have a level depending on the material: Bone Spear (shaman), Obsidian Spear (inventor), Horn Spear (hunter). Spears will give you a 20% chance to deal increased damage with each hit, again the factor depends on the items level. They can also be thrown at any target dealing a medium amount of damage, the weapon will then drop onto the ground. Spears can be coated with poison in the inventory, making them quite lethal for hit and run encounters.
And no! Warriors cannot dual wield spears. This feature was removed in an early test versions because warriors always stumbled over the long handles and got themselves staked.
There are types of weapons which are restricted to to certain classes:
- Warrior: All level 4 items.
- Hunter: Traps and Bows.
- Shaman: Spellbooks, Staves, Wands and Blowpipe.
- Inventor: Guns, Bombs, Missiles, Grenades, Mines.
Full Metal Troll.
So you have made some weapons to deal with those critters faster and more efficient. The next step is to make some armor and gear to shield you from the damage, environmental effects and to give you some other bonuses.
To craft armor you will have to create a Tannery first. The Tannery Kit can be crafted in your inventory, you'll need 3 woods and 1 pig skin.
The first thing you might want get is a pair of boots to increase your runspeed by 30 points, especially as warrior this is essential. Depending on your preferences you can decide between leather and fur boots, if you need the armor you'll most likely chose leather, which can be upgraded with a bronze bar in the armory for addiditonal protection.
Depending on the base material leather boots can be used by different classes : Pig Skin Boots (shaman), Chitin Boots (inventor), Snake Boots (hunter) and Alligator Boots (warrior).
If you want the runspeed to cover more ground searching for resources and animals, you will prefere fur boots since they also provide protection against cold. This is enough to travel through the jungle at night for an extended period of time on normal difficulty. Fur boots can be padded with linen cloth to improve the protection against cold.
All fur boots are level one and can be used by any class.
The next you want to get is some body armor, depending on what you are facing as opponents you can chose the type of armor. Again leather is the choice if you want to go for protection against melee, it can be upgraded with 2 bronze bars and 1 iron bar to better quality.
Depending on the base material leather armors can be used by different classes : Pig Skin Armor (shaman), Chitin Armor (inventor), Snake Armor (hunter) and Alligator Armor (warrior).
Fur armor provide less protection against physical attacks but improve your ability to resis the cold. fur armors can be padded into gambesons providing increased protection against cold. Additionally you cannot get wet anymore and gain a 20% resistance against power attacks, like spells, arrows, gunshots etc.
All fur armors are level one and can be used by any class, the better . They can be upgraded with a Giant Tortoise Shell into Tortoise Armor, this gives another +20% resistance against power attacks. Care the outcome of this upgrade restricts the armors by the base materials to different classes.
Shields are a good choice for warriors who have to counter ranged attacks but also for hunters they are useful in some situations, since they cannot be used with ranged weapons equipped they prove less useful for inventors and shamans. But still in situations where you have to exspect a power attack, equipping a meele weapon with a shield might give you an edge over other ranged classes, even for shamans. Basically shields grant you a chance to negate a fixed amount of damage and giving you a spellblock every 8-16 seconds depending on their item level: Da Big Shield (shaman), Tortoise Shield and Giant Shield (inventor), Bronze Shield (hunter) and Iron Shield (warrior). Note that Da big Shield is a quest item and Giant Shield is an invention made by the inventor.
What, you aren't finished yet ?!
Closing down further on other items would expand this already long "basic" guide into oblivion, because each class has its own characteristics and there are many ways to play a class.
There are two NPC at the center visible to every player. To the left the Old Chief troll which grants a new quest with special items every day. To finish a quest put the items into the trolls Old Chiefs inventory and press the quest, the rewards will spawn next to the troll so be aware of reward snatching enemies. Unless a boss spawns in any of the four corners one quest is given each beginning of the day.
To the right of the maps center is the Voodoo merchant, you can sell and buy special items from him. He can release you from your contract with the devil for 100 gold pieces. It is wise to upgrade your merchant with the trading agreement you can close with him, this enables you to trade rare resources like herbs, oil and manastone which aren't easy to come by.
As mentioned before, at dawn there is a chance for a boss to spawn at one of the maps corners, these bosses are mean enemies and require good gear and a good team to defeat.
Southwest of the center is the Froll village. These are amphibious animals and will defend their village from any tresspasser. Try to stay away from them, they are armed with harpoons and are quite dangerous in numbers. As soon the village has reached a certain size they will move out and go to war, to ensure their rule over the jungle.rollo - half troll half toad. They live in areas of water and build their villages on the banks. Fish and extract energy stones, allowing them to expand their empire. Their main weapon - it harpoons. Frollo like to travel through the jungle in search of tasty fish and treasures, so they can meet almost anywhere, but if you do not touch the chances are they will not attack you, but if you manage to invade their village expect trouble.
There are other dangerous places you should stay away from if you value your life, the Anaconda pit on the left, the spiders nest to the right, and the piranhas infested pools throughout the jungle, all capable of serving you a quick and painful death.
If you haven't given up reading the tutorial yet, you'll have lots of fun with the map for sure. Everything you need to know is in the games tooltips and here on the wikia. If you think a information is missing feel free to add it to the wikia, or write a guide on your own.
Be good trollin 'mon!